Tuesday, December 22, 2009

Homemade Jam


For Christmas this year, I decided to make homemade jam. A friend of ours made one last year for Christmas and I thought it was a pretty unique and thoughtful gift for friends and family. So, I looked on the internet to see how to make home canned jam, this website was very informative and comprehensive.

Supplies needed:

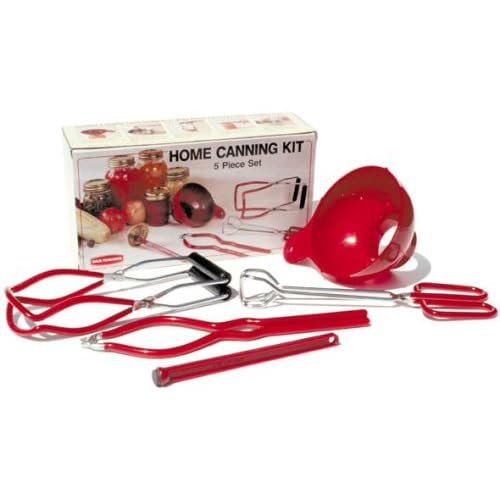
1) I bought this kit for $13 on amazon.com

:

2) I bought a box of home canning jars from Ralphs, they're about $10 for 12. They come in different sizes but I liked the 4oz and 8oz jars- they seem perfect for jam!


3) Instead of buying a canning pot, i used a regular pasta pot with a rack on the bottom of the pot.

I made 2 kinds of jam: Blackberry and pinapple, they are in season around this time of the year.  Also i made them with low sugar, the regular recipes seemed a little too high in sugar content.

Low-Sugar Pinapple Jam Recipe:
  • 4 Cups of finely chopped pinapple
  • 2 cups of sugar
  • 1 lemon (sliced)
  • 1 box of sureJell pectin

Low-Sugar Blackberry Jam Recipe:
  • 3 Cups of chopped blackberry
  • 1 cup of sugar
  • 1/4 cup of lime
  • 1 box of of no sugar needed SureJell Pectin

Directions:
  • Cook all ingredients in low heat, except (Pectin) for 15 minutes.
  • Add SureJell Pectin and cook for 5 minutes.
  • Pour hot jam over the sterilized jars and lids
  • Close jars and process in boiling bath as directed here in step 13. (This will seal the jars and allow the jam to be stored up to 12 months, but 6 months recommended)


I made 2 dozens of these!

Monday, December 7, 2009

French Apple Tart

Since its apple season, I made several of these apple tarts to Thanksgiving parties. These are simple to make, only needs Butter, sugar, apples. :)

Tuesday, November 24, 2009

Blueberry-Lime Cake

I got inspired from this recipe and used lime instead of lemon, but I think either one would be great.


Ingredients:


  • 2 cups all-purpose flour

  • 2 tsp baking powder

  • 1/2 tsp salt

  • 1/2 cup margarine or butter, softened

  • 1 cup sugar

  • 2 large eggs

  • 1/2 cup milk

  • 1 1/2 cups blueberries


Lime Glaze:


  • 1/3 cup sugar

  • 1/4 cup fresh lemon juice


Directions:


  1. Preheat oven to 180C (350F).

  2. Grease and flour 9" by 5" metal loaf pan.

  3. In medium bowl, combine flour, baking powder and salt.

  4. In large bowl, in mixer at low speed, beat margarine and sugar just until blended.

  5. Increase speed to medium; beat about 5 minutes, until light and creamy.

  6. Reduce mixer speed to low; add eggs, 1 at a time, beating after each addition until well blended, occasionally scraping bowl with rubber spatula.

  7. Alternately beat flour mixture and milk into egg mixture, mixing just until blended.

  8. Gently stir in blueberry.

  9. Spoon batter into loaf pan.

  10. Bake loaf 1 hour 5 minutes, or until toothpick inserted in center comes out clean.

  11. Place sheet of waxed paper until wire rack.

  12. Cool loaf in pan on wire rack for 10 minutes.

  13. Remove from pan and place on rack.

  14. With cake tester or skewer, prick top and sides of warm loaf all over.

  15. Prepare Lemon glaze: In small bowl, mix lemon juice and sugar. With pastry brush. brush top and sides of warm loaf with lemon glaze.

  16. Cool loaf completely on rack.


Applying A Glaze: Besides adding flavour to a cake, tea bread, or tart, a glaze can give a smooth, lustrous finish and seal in its moisture. Glazes can be as simple as melted jam, or a mixture of sugar and liquid. Set the cake over waxed paper to catch drips. For a flavor that permeates, prick the cake all over, then brush glaze over the top and sides of the still-warm cake.


Sunday, July 19, 2009

Flourless Chocolate Cake

IMG_4694


I always wanted to try making a flourless cake but never got to try it. The ingredients seemed like a brownie recipe, except lighter, with eggwhite mixture to make it fluffy and light as air.  Definitely this is an easy dessert to impress your guest!

Ingredients:

12 oz Guitard 75% bittersweet chocolate
5 tablespoons (1/3 cup) butter
5 tablespoons (1/3 cup) milk
5 tablespoons (1/3 cup) finely ground almonds
4/5 cup (180 g) sugar
1 teaspoon baking powder
4 eggs, separated

Method:

  1. Preheat oven to 350 deg F (Gas mark 4 or 180 deg C).

  2. Line a 9 in (23 cm) cake tin with grease proof or other non-stick paper and grease the tin.

  3. Break the chocolate into small pieces and melt it with butter and milk over hot water.

  4. Beat the egg yolks with half of the sugar.

  5. Fold in the melted butter and chocolate mixture.

  6. Fold inn ground almonds and baking powder.

  7. Beat egg whites until frothy by using an electric mixer; gradually add the remaining sugar, beating until stiff peaks form.

  8. Fold in the beaten egg whites.

  9. Bake at 350 degrees for 40 minutes or until a wooden pick inserted in center comes out clean. Please note that cakes of this type will collapse and look like a pie (see the picture).


The Flourless Chocolate Cake may be served warm or cold with whipped cream. The cream may be dusted with cocoa powder before serving, and the cake may be dusted with powdered sugar.

Packaging the Toffee...

Packaging the toffee was the fun part.I bought ready made kits fromMichaels, they come in different sizes. Here are some pics.


Saturday, July 18, 2009

Chocolate Almond Buttercrunch Toffee


Finally, I found a recipe that I liked, the key ingredient was the butter. I had to try different brands to get the results I wanted. The recipe is as follows:

  • 1 lb unsalted butter

  • ½ tea. table salt

  • 2 cups granulated sugar

  • 3 tbsp. water ( or 2 tbs of water, and 1 tbs of corn syrup)

  • 1 cup slivered almonds (do not use sliced almonds)

  • 12 oz. semi-sweet chocolate (chips are fine)

  • 1½ -2 cups lightly toasted pecans (or walnuts), finely chopped


Melt ¾ of chocolate over hot water or in a microwave oven at half power for 2-3 minutes. When melted, stir in remaining chocolate and set aside. Line a large jelly roll or half-sheet pan with heavy-duty foil and butter the foil.

Melt the butter with the salt in a heavy 3 quart saucepan over medium heat. Slowly add the sugar, stirring constantly with a wooden spoon. Add the water about halfway through this process.

After all the sugar is added, begin testing the mixture to see if the sugar is dissolved. Place a drop of mixture on wax paper; allow it to cool and rub it between your fingers to make sure it doesn’t feel grainy. If it does, continue to cook and test again. The mixture will probably be boiling at this point.

When sugar is dissolved, add the almonds, and increase the heat to medium high. Cook to the hard-crack stage, or about 310-320 degrees on a candy thermometer, stirring often to keep the candy from burning on the bottom. When it’s done, it should be a medium-dark amber color and have a caramel aroma. The almonds should have a toasted color but they should not burn. This is the tricky part, as there’s a thin line between perfect and overdone, and to some extent it’s a matter of taste.

Remove from heat and pour into the prepared pan, spreading as evenly as possible with an offset spatula. Be careful, this stuff is hot! Set the pan on a cooling rack. After 2-3 minutes, when toffee is just set, pour reserved chocolate on top and spread evenly. Sprinkle with chopped nuts, and press them in gently with a spatula or bottom of a glass to anchor them in the chocolate.

Allow the toffee to harden at least 6-8 hours—overnight is better. Break into pieces using a sharp pointed knife with a rigid blade, or you can use your hands. Store in an airtight container in a cool place. Makes about 3 pounds.

Chocolate: I tried to get Valhrona chocolate but the store was out. I tried this Scharffen Berger chocolate in  semisweet (62% cacao) and bittersweet (75%).

Fleur de sel: This is like the first time i have seen or used this. Its basically the best sea salt there is.  Here is some info on this salt:

Fleur de sel is a type of sea salt obtained by hand harvesting the "young" crystals that form on the surface of salt evaporation ponds. The harvesting of fleur de sel always takes place in the summer months when the sun is strongest. Most fleurs de sel claim to have higher mineral contents than table salts and often smell deliciously like the ocean.

Nuts: I got two types of almonds, slivered, and chopped. I roasted them to bring out the aroma and roasted flavors.

Thursday, July 16, 2009

Something Homemade Project Part II

For my second attempt, i didn't want to try anything fancy, just something simple that looks like a toffee. I tried another recipe from JoyOfBaking.com.

The results: They came out okay. The recipe was entirely used with brown sugar, so there was a strong molasses taste.  But i wasn't completely satisfied, it didn't taste like toffee, it tasted more like brittle.

joyofcooking

Monday, July 13, 2009

Something Homemade Project...Part I

A few of my friends decided to do a "something homemade project" . The requirements were simple, we had to make something from scratch, and then mail it to each other as a surprise.  I thought what can I possibly do that is decent and not scare people,  and i couldn't think of making anything except baking...but at least for the challenge, I wanted to make something I haven't done before.

I started by doing some research on what looked good. I looked at martha stewart.com and was ready to make something like this, and then I saw this post on buttercrunch toffee and fell in love! It looked pretty easy to do and so I said okay I am going to make a variation of it and make bite size toffee.

So, first thing, I went and bought a candy thermometer, and a candy mold from Michaels.

20090623-IMG_4512

20090623-IMG_4514

I followed the recipe for the toffee part and poured it to the mold. Then added chocolate chips, and nuts. Simple enough right?? Wrong!! The toffee came out very sugary, and the sugar crystalized. I did some reasearch and they said I needed to use wooden spoon to prevent that and stir as little as possible, bla bla bla. Okay fine, I'll try again. But here are the results...it was not buttery nor crunchy. More to come soon.

20090624-IMG_4525

Wednesday, July 1, 2009

Crème Brûlée

cremebrulee

Ingredients:

  • 6 egg yolks

  • 1/3 cup granulated white sugar

  • 2 cups heavy cream or half and half

  • 1 vanilla bean (split and scraped)

  • 1 teaspoon of white sugar (to caramelize the top)


Directions:

1) Preheat the oven to 325 degrees F.

2) Place the cream, vanilla bean and its pulp into a medium saucepan set over medium-high heat and bring to a boil. Remove from the heat, cover and allow to sit for 15 minutes.  Take out the vanilla bean.

3) In a medium bowl, whisk together 1/2 cup sugar and the egg yolks until well blended. Add the cream from step one a little at a time, stirring continually.

4) Pour the liquid into 6 ramekins. Place the ramekins into a large cake pan or roasting pan. Pour enough hot water into the pan to come halfway up the sides of the ramekins.

5) Bake for 40-45 minutes, until the middle is set.

6) Remove the ramekins from the roasting pan and refrigerate for at least 2 hours.

7) Remove the creme brulee from the refrigerator for at least 30 minutes prior to browning the sugar on top.  Put 1 teaspoon of sugar and spread evenly on top. Using a torch, melt the sugar and form a crispy top. Allow the creme brulee to sit for at least 5 minutes before serving.

Sunday, May 17, 2009

Lemon Bars

Lemon bars is one of my favorite desserts, so I gotta try different versions of it. This one is from Barefoot Contessa, my favorite foodnework cook.


For the crust:


  • 1/2 pound unsalted butter, at room temperature

  • 1/2 cup granulated sugar

  • 2 cups flour

  • 1/8 teaspoon kosher salt


For the filling:


  • 6 extra-large eggs at room temperature

  • 3 cups granulated sugar

  • 2 tablespoons grated lemon zest (4 to 6 lemons)

  • 1 cup freshly squeezed lemon juice

  • 1 cup flour

  • Confectioners' sugar, for dusting


Directions:

  1. Preheat the oven to 350 degrees F.

  2. For the crust, cream the butter and sugar until light in the bowl of an electric mixer fitted with the paddle attachment. Combine the flour and salt and, with the mixer on low, add to the butter until just mixed. Dump the dough onto a well-floured board and gather into a ball. Flatten the dough with floured hands and press it into a 9 by 13 by 2-inch baking sheet, building up a 1/2-inch edge on all sides. Chill.

  3. Bake the crust for 15 to 20 minutes, until very lightly browned. Let cool on a wire rack. Leave the oven on.

  4. For the filling, whisk together the eggs, sugar, lemon zest, lemon juice, and flour. Pour over the crust and bake for 30 to 35 minutes, until the filling is set. Let cool to room temperature.

  5. Cut into triangles and dust with confectioners' sugar.


Friday, May 15, 2009

Fruit Tart

I made these over the weekend for my husband's bday party. I used a different vanilla filling recipe from the ones I used to make before.


Tart Pastry:

  • 1 large egg yolk

  • 1 tablespoon heavy cream

  • 1/2 teaspoon vanilla

  • 1 1/4 cups of unbleached flour

  • 2/3 cups of confectioner sugar

  • 1/4 teaspoon salt

  • 8 tablespoons of butter


Method:

1) Whisk together cream, vanilla, and egg yok.

2) In a bowl, combine flour, salt, sugar.

3) in a food processor, put the flour mixture and then small pieces of cold butter.

4) Pulse the mixture until the flour is blended like a course cornmeal.

5) While the machine is running ( or in a stand mixer) mix the flour mixture with the egg mixture until the dough forms.

6) Wrap the dough in plastic wrap and refrigerate at least 2 hrs before using it.

7) Press and fill individual molds.


Vanilla Bean Pastry Cream:

  • 1 1/2 Cups Whole Milk

  • 1 vanilla Bean

  • 1 Large egg

  • 2 large egg yolks

  • 6 tablespoons sugar

  • 14 cup of unbleached all purpose flour

  • 2 tablespoons of butter


Makes about 2 cups.

Steps:

1) Fill the large bowl halfway with ice and water and set aside. Pour the milk into the medium saucepan. Use the tip of a pairing knife and cut the vanilla bean in half lengthwise. Turn the knife over and use the dull side to scrape the seeds into the saucepan, then add the pod. Heat until mixure just begins to simmer. Remove from heat and let steep for 30 mins.

2)  Heat the milk to just below the boiling point and remove from the heat. In a medium bowl, whisk together the egg, egg yolks, and sugar until well blended and smooth. Add the flour and whisk vigorously until the mixture is very smooth. Pour about 1/2 cup of the hot milk into the yolk mixture, whisking constantly to temper the yolks. Slowly pour the yolk back into the hot milk, whisking all the time.

3) Heat the mixture, whisking constantly to prevent the flour from lumping, until it reaches a boil. Continue to cook and whisk for another minute, until the pastry cream is very thick. Remove from the heat and whisk in the butter ( and vanilla extract). Stran the pastry cream through the strainer set over medum bowl to remove lumps or tiny bits of eggs.

4) Press a piece of plastic wrap directly on the surface of the pastry cream, then set the bowl into the bowl of ice water.  Once the pastry cream has completely cooled, use or store in the fridge until needed.

Saturday, March 21, 2009

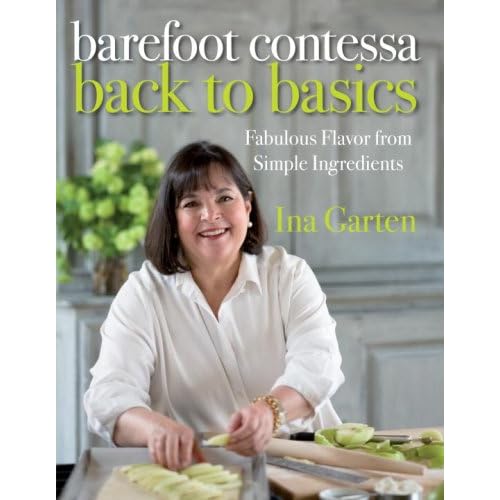
Barefoot Contessa: Back to Basics

I love this book. Its my new favorite. Everything I have tried is good, great book. You can get the book cheaper at costco.

The Art and Soul of Baking Class at Sur La Table

I have always wanted to take a baking or cooking class at Sur La Table, but never went because you had to pay a for the class. Its not a lot, but not little either, and I thought, I know how to cook or bake, so If I followed a recipe, I can do it. Recently my friend and I looked at the "Art and Soul of Baking " series and decided to try it - We thought that because of the hands on experience it might be worth it. So after taking the class, I think it was totally worth the money and time.

1) The tips and tricks might not be something you can find out on your own.

2) The ingredients they used were outstanding. You also learn about the different ingredients from the instructor.

3)  The recipes are very good.  Sometimes you look for a recipe, and you're not sure if it was a good one until you try it out.  After the class, you will know for sure how it turned out.

We spent 3 hours preparing the following:

Classic French Fruit Tart

I often make mini fruit tarts, and I tend to messup easily on the pastry cream. I finally found the trick!
French Fruit Tart
Warm blueberry crumble tart

This was supposed to be a cranberry tart but cranberries are not in season right now.
Blueberry Tart
Potato, Onion, and Gruyere Galette

Believe it or not , this is one of my favorites from the class! The gruyere and caramelized onions, with the buttery crust tasted like heaven!
Galette
Fromage Blanc, Tomato, and Herb Tart

Fromage Blanc is a soft, spreadable goat cheese with texture similar to ricotta cheese. Because it was a mild flavored cheese, it made the tart a very light appetizer.
Tomato Tart
Lemon Merengue Plyllo Cups

Being a lemon lover, this is my favorite of the class. The lemon was tart the way I liked it, and the sweet merengue combination was perfectly matched with the light crispyness of the phyllo.
Lemon Merengue Tart
Here is what you can expect in the class:

1) All ingredients were nicely organized, and prepared (except onions and potatoes, you had to cut them)

2) One or two people working on one recipe at a time ( We werent able to get hands on experience on all the recepes)

3) The instructor will explain the whole process and you get to watch and ask questions

4) You get to eat and enjoy everything everyone made at the end of the class! ( Of course this was my favorite part!)

Here is a picture of us working on the phyllo. As you can see, there is a plenty of room to work with and practice!

SLT Class1

I will try to post some of the recipes later when I get a chance.

Sunday, March 15, 2009

Chocolate Banana Nut Bread Mini Loaves

My second try on banana bread I decided to try something different- with chocolates! Chocolates goes well with bananas and nuts :) I used this recipe with yogurt to see if there was a difference with the moisture of the bread and I did find it to be more moist that using baking powder/soda combo.

IMG_2950

Ingredients

Ingredients:
1 3/4 cups all-purpose flour
1/4 Cups of unsweetened cocoa powder
3/4 teaspoon baking soda
1/2 teaspoon salt
1 cup granulated sugar
1/2 cup butter, softened
1 1/2 cups mashed ripe banana (about 3 large bananas)
2 eggs
1/3 cup plain yogurt
1/2 cup semisweet chocolate chips
1 cup of chopped walnuts

Preheat oven to 350 degrees F (180 degrees C) and place oven rack to middle position. Butter and flour (or spray with a non stick vegetable/flour spray) the bottom and sides of a 4 mini loaf pans.

Place the nuts on a baking sheet and bake for about 8 to 10 minutes or until lightly toasted. Let cool.

In a large bowl, mash bananas, add eggs, vanilla, melted butter, and yogurt.

In another large bowl, mix all the dry ingredients.

Fold the dry into the wet ingredients, and mix well (but dont over beat).

Fold in most of the walnuts, and chocolate chips. Sprinkle on the top for decoration.

Banana Bread


bananabread

I decided to make a banana bread from the ripe bananas that we had at home. Normally, I wouldn't eat bananas that are ripe (any bananas with dark spots), but I love putting the banana into a bread. I found this recipe from joyofbaking.com.

Ingredients:

1 cup walnuts

1 3/4 cups all-purpose flour

3/4 cup (150 grams) granulated sugar

1 teaspoons baking powder

1/4 teaspoon baking soda

1/4 teaspoon salt

1 teaspoon ground cinnamon

2 large eggs

1/2 cup unsalted butter melted and cooled

3 ripe large bananas, mashed well (about 1-1/2 cups)

1 teaspoon pure vanilla extract
Preheat oven to 350 degrees F (180 degrees C) and place oven rack to middle position. Butter and flour (or spray with a non stick vegetable/flour spray) the bottom and sides of a 9 x 5 x 3 inch (23 x 13 x 8 cm) loaf pan. Set aside.

Place the nuts on a baking sheet and bake for about 8 to 10 minutes or until lightly toasted. Let cool and then chop coarsely.

In a large bowl combine the flour, sugar baking powder, baking soda, salt, cinnamon, and nuts. Set aside.


In a medium-sized bowl combine the mashed bananas, eggs, melted butter, and vanilla. With a rubber spatula or wooden spoon, lightly fold the wet ingredients (banana mixture) into the dry ingredients just until combined and the batter is thick and chunky. (The important thing is not to over mix the batter. You do not want it smooth. Over mixing the batter will yield tough, rubbery bread.) Scrape batter into prepared pan and place the slices of banana on top of the batter for garnish. Bake until bread is golden brown and a toothpick

inserted in the center comes out clean, about 55 to 60 minutes. Place on a wire rack to cool and then remove the bread from the pan. Serve warm or at room temperature. This bread can be frozen.

Makes 1 - 9 x 5 x 3 inch loaf.

Wednesday, January 7, 2009

Bittersweet Chocolate and Cointreau Mousse

IMG_2106

I got this recipe from my Le Cordon Bleu book. I used bitter sweet chocolate instead of semi sweet; I prefer the bitter sweet chocolate but any chocolate can be used.

Ingredients:

4 oz Bitter sweet chocolate (I used the E.Guittard 72% cacao)
3 Tb unsaulted butter
1/4 cup orange juice
3 tb cocoa butter
3 eggs, separated
2 tb Cointreau
1/3 cup whipping cream
1 egg white
2 tb sugar

Directions:
1. Place chocolate butter and oj in a double boiler to melt, in a simmering water
2. When melted, stir in cocoa powder. Remove from water and whisk in egg yolk and cointreau. Let cool.
3. Beat the cream until soft peaks.
4. Beat all the egg whites until soft peaks. Add sugar until smooth.
5. Using a large spoon, gently fold egg whites into the cooled chocolate mixture. Before they are completely incorporated, fold in the whipped cream.
6. Spoon into individual serving dishes.

Linzer Cookies


I made this for a Christmas party. They were simple to make and delicious.

Recipe:


1 cup blanched or sliced almonds


2 cups (280 grams) all purpose flour


1/2 teaspoon cinnamon


1/4 teaspoon salt


1 cup (227 grams) (2 sticks) unsalted butter, room temperature


2/3 cup (135 grams) granulated white sugar, divided


1 teaspoon pure vanilla extract


2 large egg yolks


Zest of 1 lemon


Confectioners' (Icing or Powdered) Sugar for dusting


I used the recipe from here.

Christmas Cookies


cookie1cookie2


This recipe makes a Christmas-size (large) batch of cookies. It can be cut in half if you like.

Ingredients:


5 cups King Arthur’s unbleached all-purpose flour


1 teaspoon baking powder


1 teaspoon fine sea salt


2 cups unsalted butter, cool room temperature (15 minutes out of the refrigerator)


2 cups superfine sugar


2 teaspoons vanilla extract


½ teaspoon orange oil (or 1 teaspoon orange extract)


finely grated zest of 2 large oranges


2 eggs, lightly beaten


Decoration


I used colored sanding sugar and colored icing that comes in a tube. I also tried a royal icing recipe.


Method:


  1. In a large mixing bowl, sift together the flour, baking powder, and salt. Whisk thoroughly to distribute the baking powder. Reserve.

  2. Using a stand mixer, cream the butter, sugar, orange zest, vanilla extract, and orange oil until light and creamy, about 3 minutes.

  3. Add the eggs, a little at a time, and continue beating until very light and fluffy, scraping the sides of the bowl several times, about 3 minutes.

  4. Add the flour mixture and mix very briefly in short bursts, just until incorporated.

  5. Divide the dough into four equal portions and flatten each portion to a ½-inch thick disk on a sheet of plastic wrap. Seal the plastic wrap around each portion of the dough and refrigerate for at least 2 hours, or overnight. (The sealed dough can be refrigerated for 2-3 days if necessary.)

  6. On a lightly floured pastry cloth, using a covered rolling pin, roll out the dough to 3/16- to ¼-inch thickness. Use a little flour to keep the dough from sticking if necessary, but try not to work too much additional flour into the dough.

  7. Cut out shapes with cookie cutters and place cookies on a lightly greased baking sheet.

  8. If desired, sprinkle with sanding sugar.

  9. Bake at 375° for 7-10 minutes, until edges are just beginning to lightly brown.

  10. Using a thin, flexible offset spatula, remove cookies from the baking sheet and cool on a wire rack.

  11. After cooling, cookies can be decorated with icing if desired.